DIY Clothes Rack
for a kids' room

I wanted to share a little DIY for the clothes rack we put together for the girls’ room. Vivi is crazy about dressing up these days, and more often than not she is wearing some kind of costume and playing pretend, which means that Brigette is right there with her doing the same. I wanted to have a place for her to keep her dresses/costumes neat and also within easy reach.
(cute colored hangers, acrylic book cart)

To create this dress up station, this is what you will need:
10' piece of 3/4" copper pipe | 2 copper elbows | center punch | hammer | edge glued board (or plywood) | 4 post caps | pliers | select pine craft board | tubing cutter
You may wish to tailor the dimensions to your space, so take that into consideration when buying materials. The base of this station is 34" wide by 15" deep, and the pipe is 40" tall by 30" wide, but I think you could go shorter. Just be sure to make certain the dimensions will fit within the 10' copper pipe length; otherwise, you will need more!

First, cut your edge glued board down to size (note: you can have this done in the hardware store when you purchase the wood!). Then, remove the screws in the post caps with the pliers. This will take a little effort, but they will come out! Then, attach them to the edge glued board by putting a screw through the top of the board into the post caps.
Next, trim your craft boards to size, and either screw them or attach them with brads to the edge of the edge glued board. By using the craft board, you cover the top of the post caps, making them appear to be cute little ball feet!
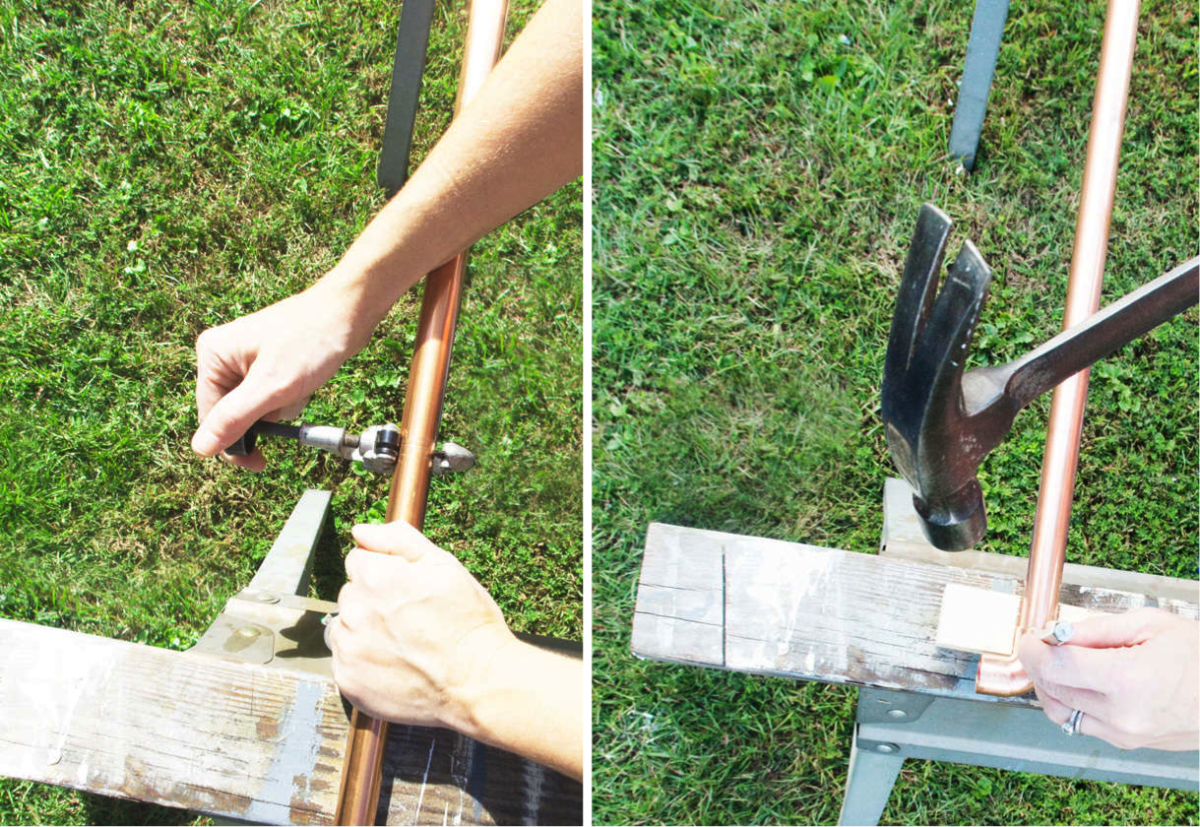
Then, cut your copper pipe to size, using the tubing cutter. This is surprisingly easy and simple! Just clamp it to the pipe where you wish to cut it, and rotate it around until the pipe is cut. Next, place the pieces into the elbow joints and using the punch and a hammer, strike it about three times so that the pipe is held securely in the elbow joint (see picture below).
Drill holes to size in the top of the edge glued board, and put the pipe in place. The hole can be tight enough that it will be a friction fit, or you may wish to add some glue to keep it extra secure.
This has been such a fun addition to Vivi's room, and it has also made it much easier to keep her space neat. She knows where her dresses go, and there is also space for her to organize her shoes. Plus, it feels special to her that it's made to scale just for her! Let me know if you have questions - I'm not the best at writing out these details, but I hope you are inspired to try a project like this!


Discussion